That's a wrap! Inspired ideas for the prettiest presents.
For some people, gift wrapping is an afterthought. A necessary evil. I prefer to think of it as opportunity to be creative and make gifts even more special. In today’s post, I share my favorite techniques as well as a fun DIY gift tag tutorial!

Make Kraft paper or newsprint even more festive by painting your own pattern!
FIRST THINGS FIRST
As it turns out, most store bought gift wrap is not made from recycled material (nor is it recyclable). I like to use recycled Kraft paper or newsprint -it serves as a perfect blank canvas to get creative. Other great options: reusable gift bags, fabric, or leftover wallpaper!
TIE IT UP
Natural jute or hemp twine is a wonderful eco-friendly option, and looks even more lovely with a sprig of holly, rosemary, or bay leaves. If you are a natural dyer or textile lover like me, you probably have piles of fabric lying around. I like to cut (or tear) fabric scraps into strips and use them as ribbon.
FINISHING TOUCHES
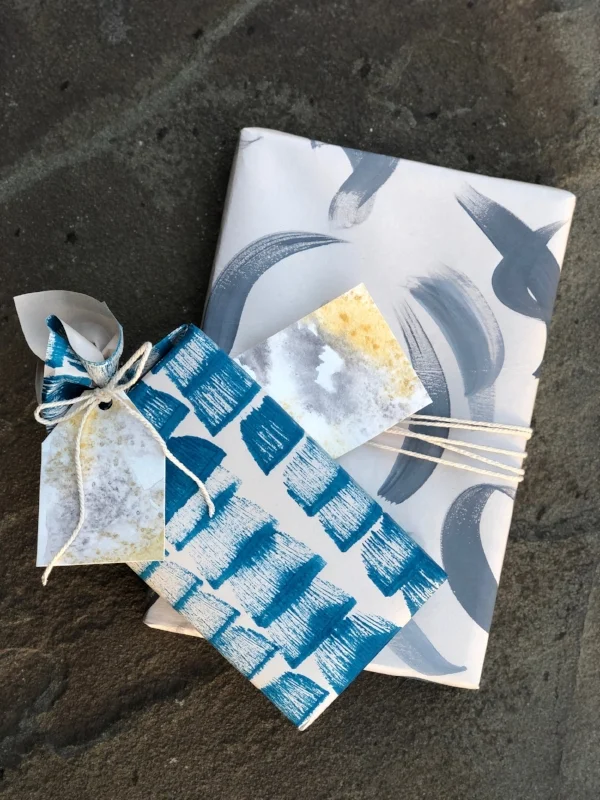
Hand painted gift tags add personal style to your gift. My absolute favorite gift tags for the holiday season are sparkly and super simple to DIY.
DIY WATERCOLOR + SALT GIFT TAGS
Materials:
Watercolor paper (I like smaller sheets for this project but any size you have on hand works!)
Watercolor paints - I chose a silvery gray and gold for this tutorial, but you can choose any colors you’d like! Keep color theory in mind, since we are working quickly with water, it is best to choose two colors that won’t combine into brown.
• Paintbrushes
• Small container of water
• Table salt
• Hole punch
• Scissors
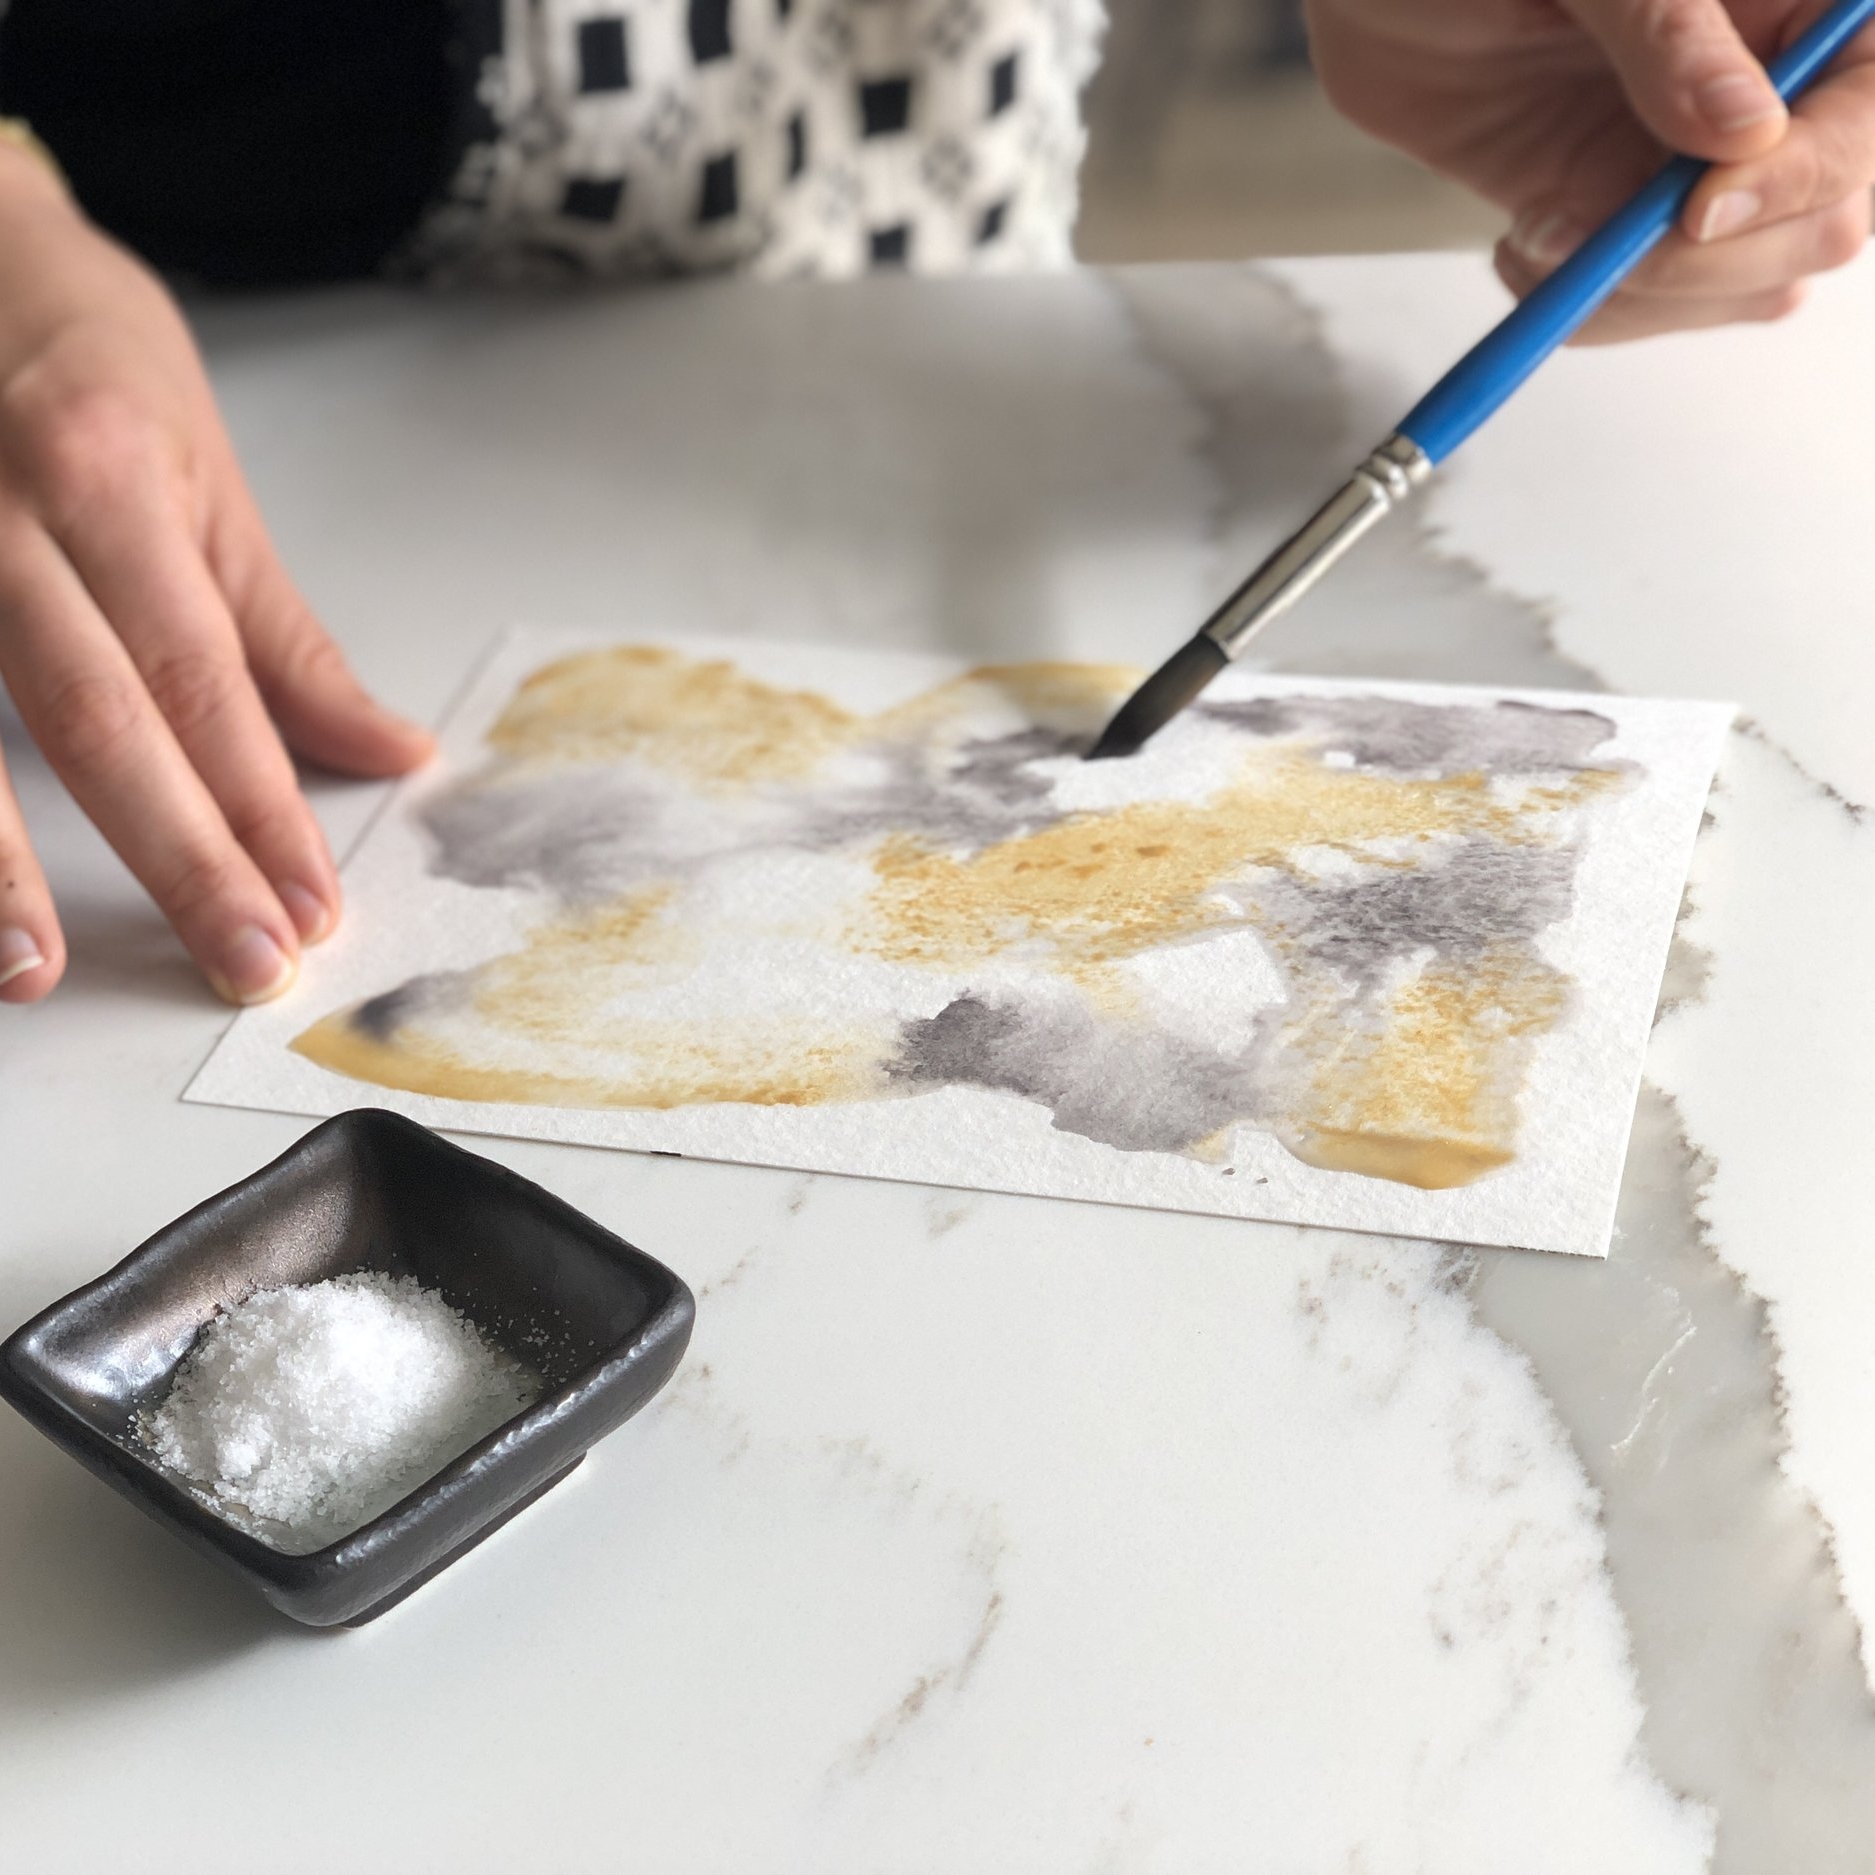
Step 1: Saturate watercolor brush with water and loosely brush water onto your paper. The paper doesn’t need to be covered completely with water - I prefer to leave some areas dry for contrast.
Step 2: Dip brush into one color then apply to various areas on your paper. Do the same with your second color.
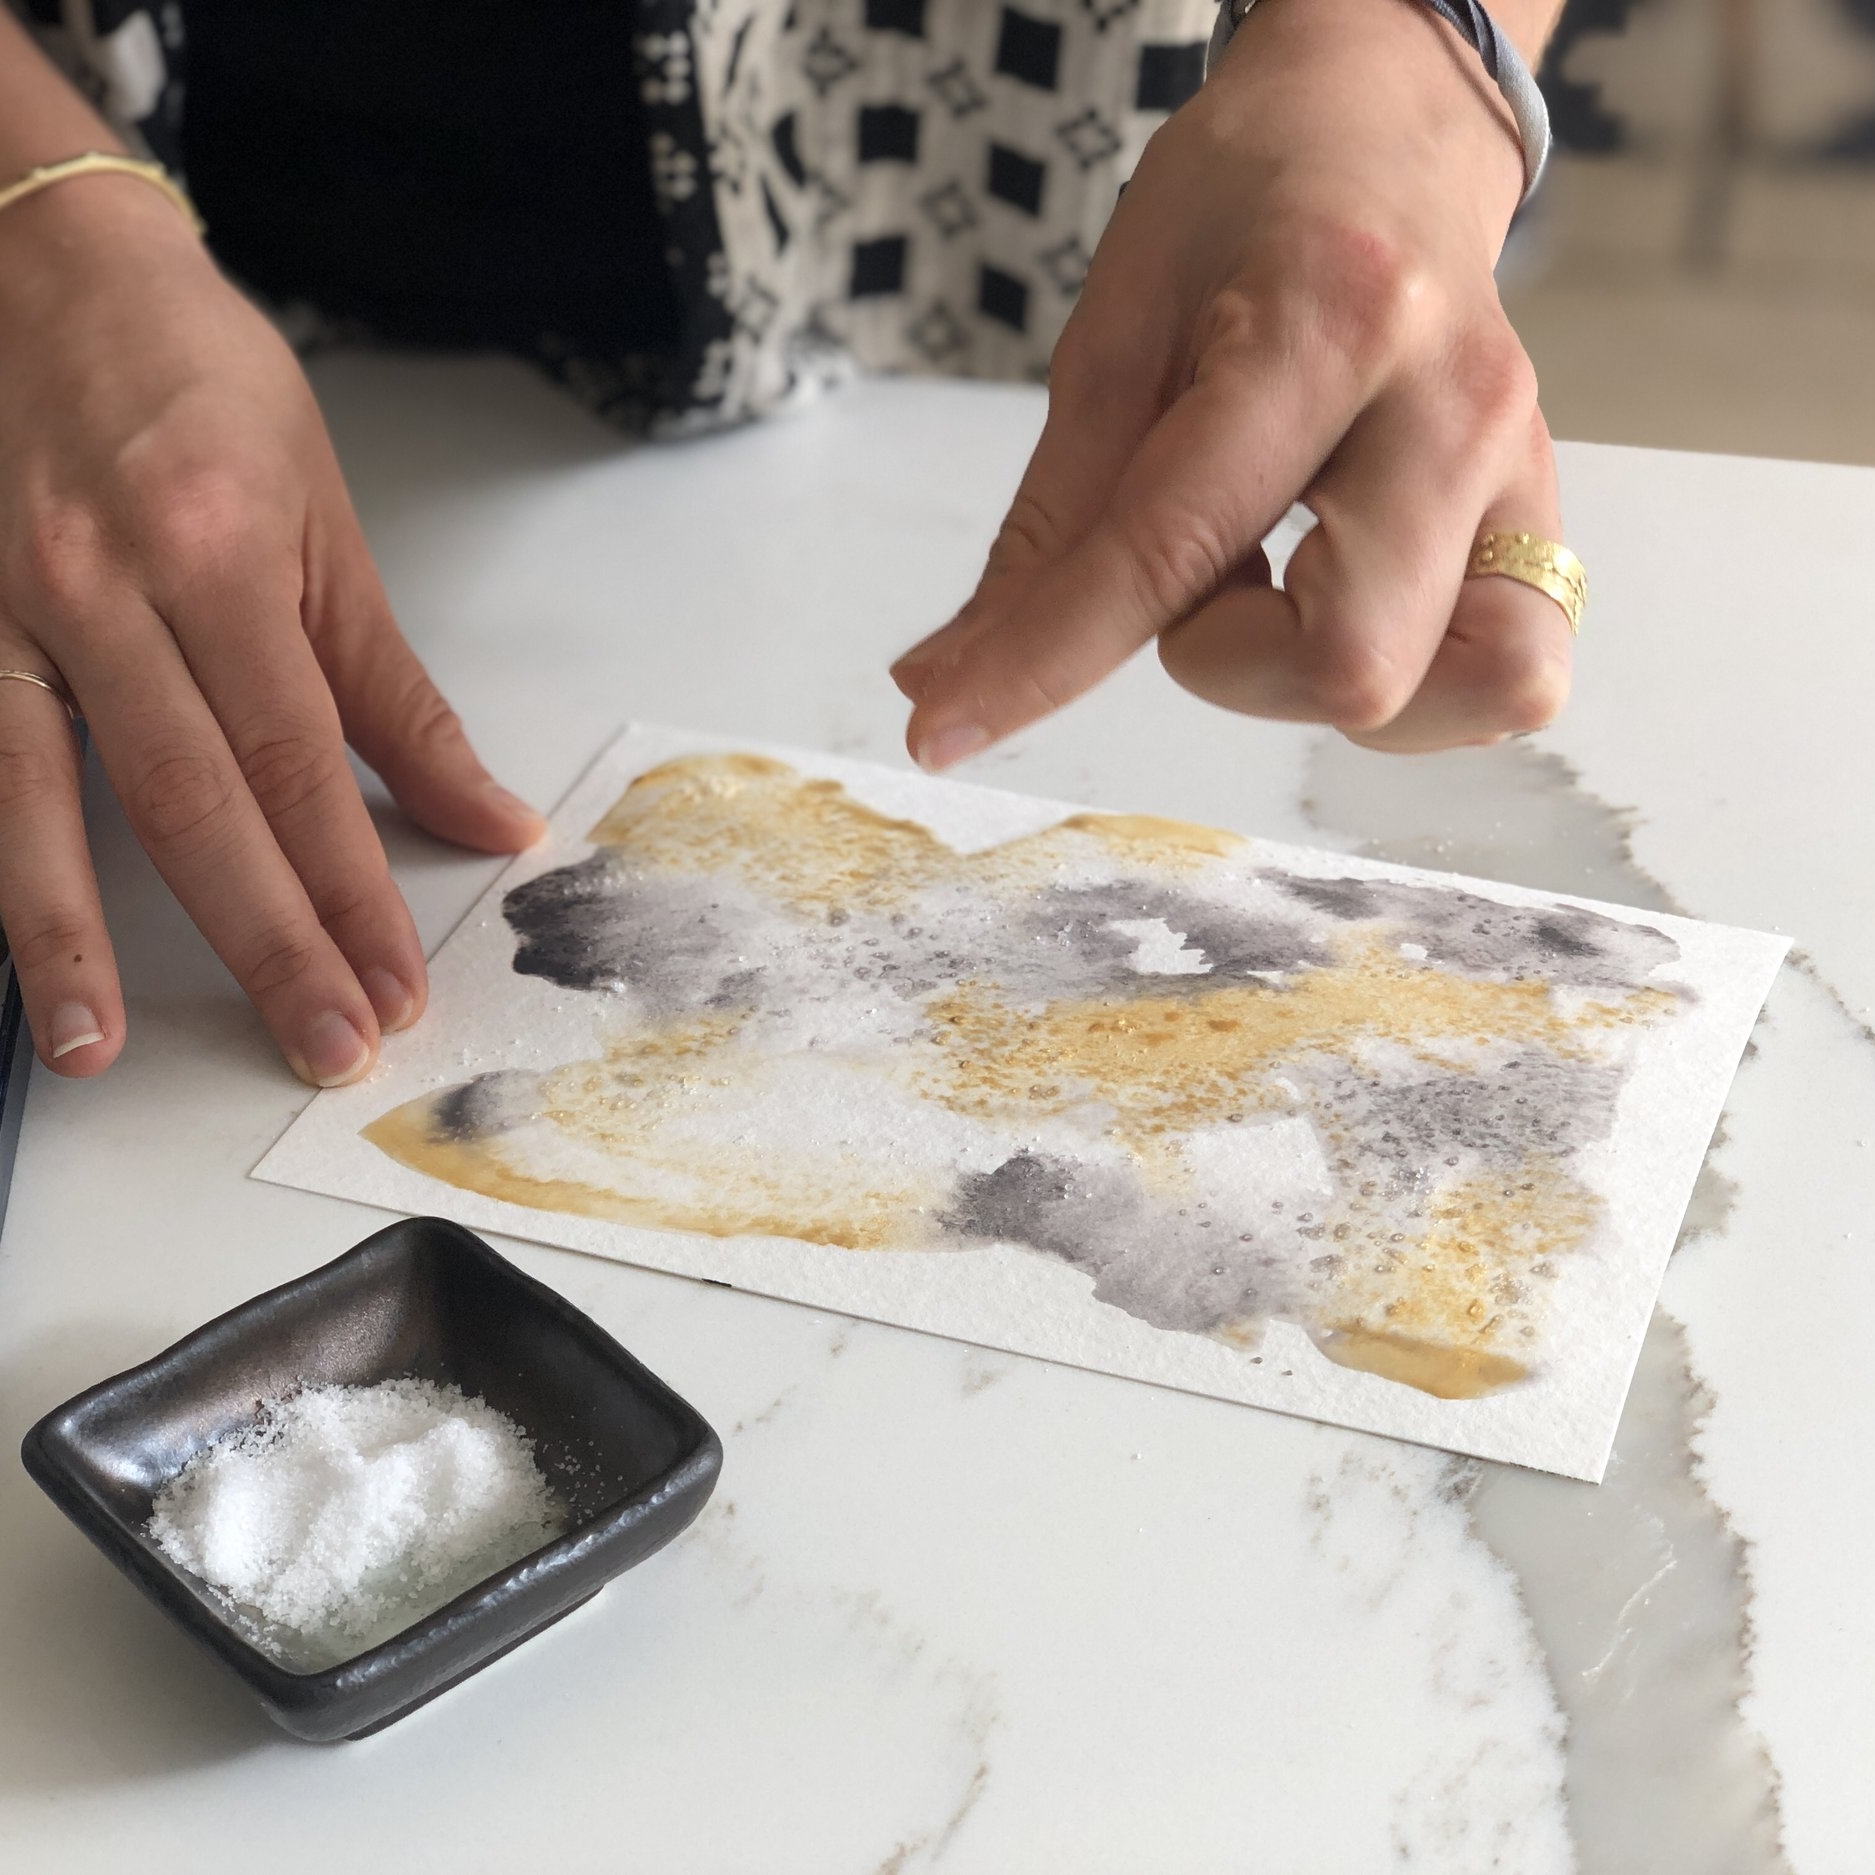
Step 3: While the paints are still wet, take a pinch of salt and sprinkle it into a few areas of your paper. Let your painting dry completely, and avoid the temptation to speed the drying process with a hairdryer or sun! You don’t want the salt crystals to melt.
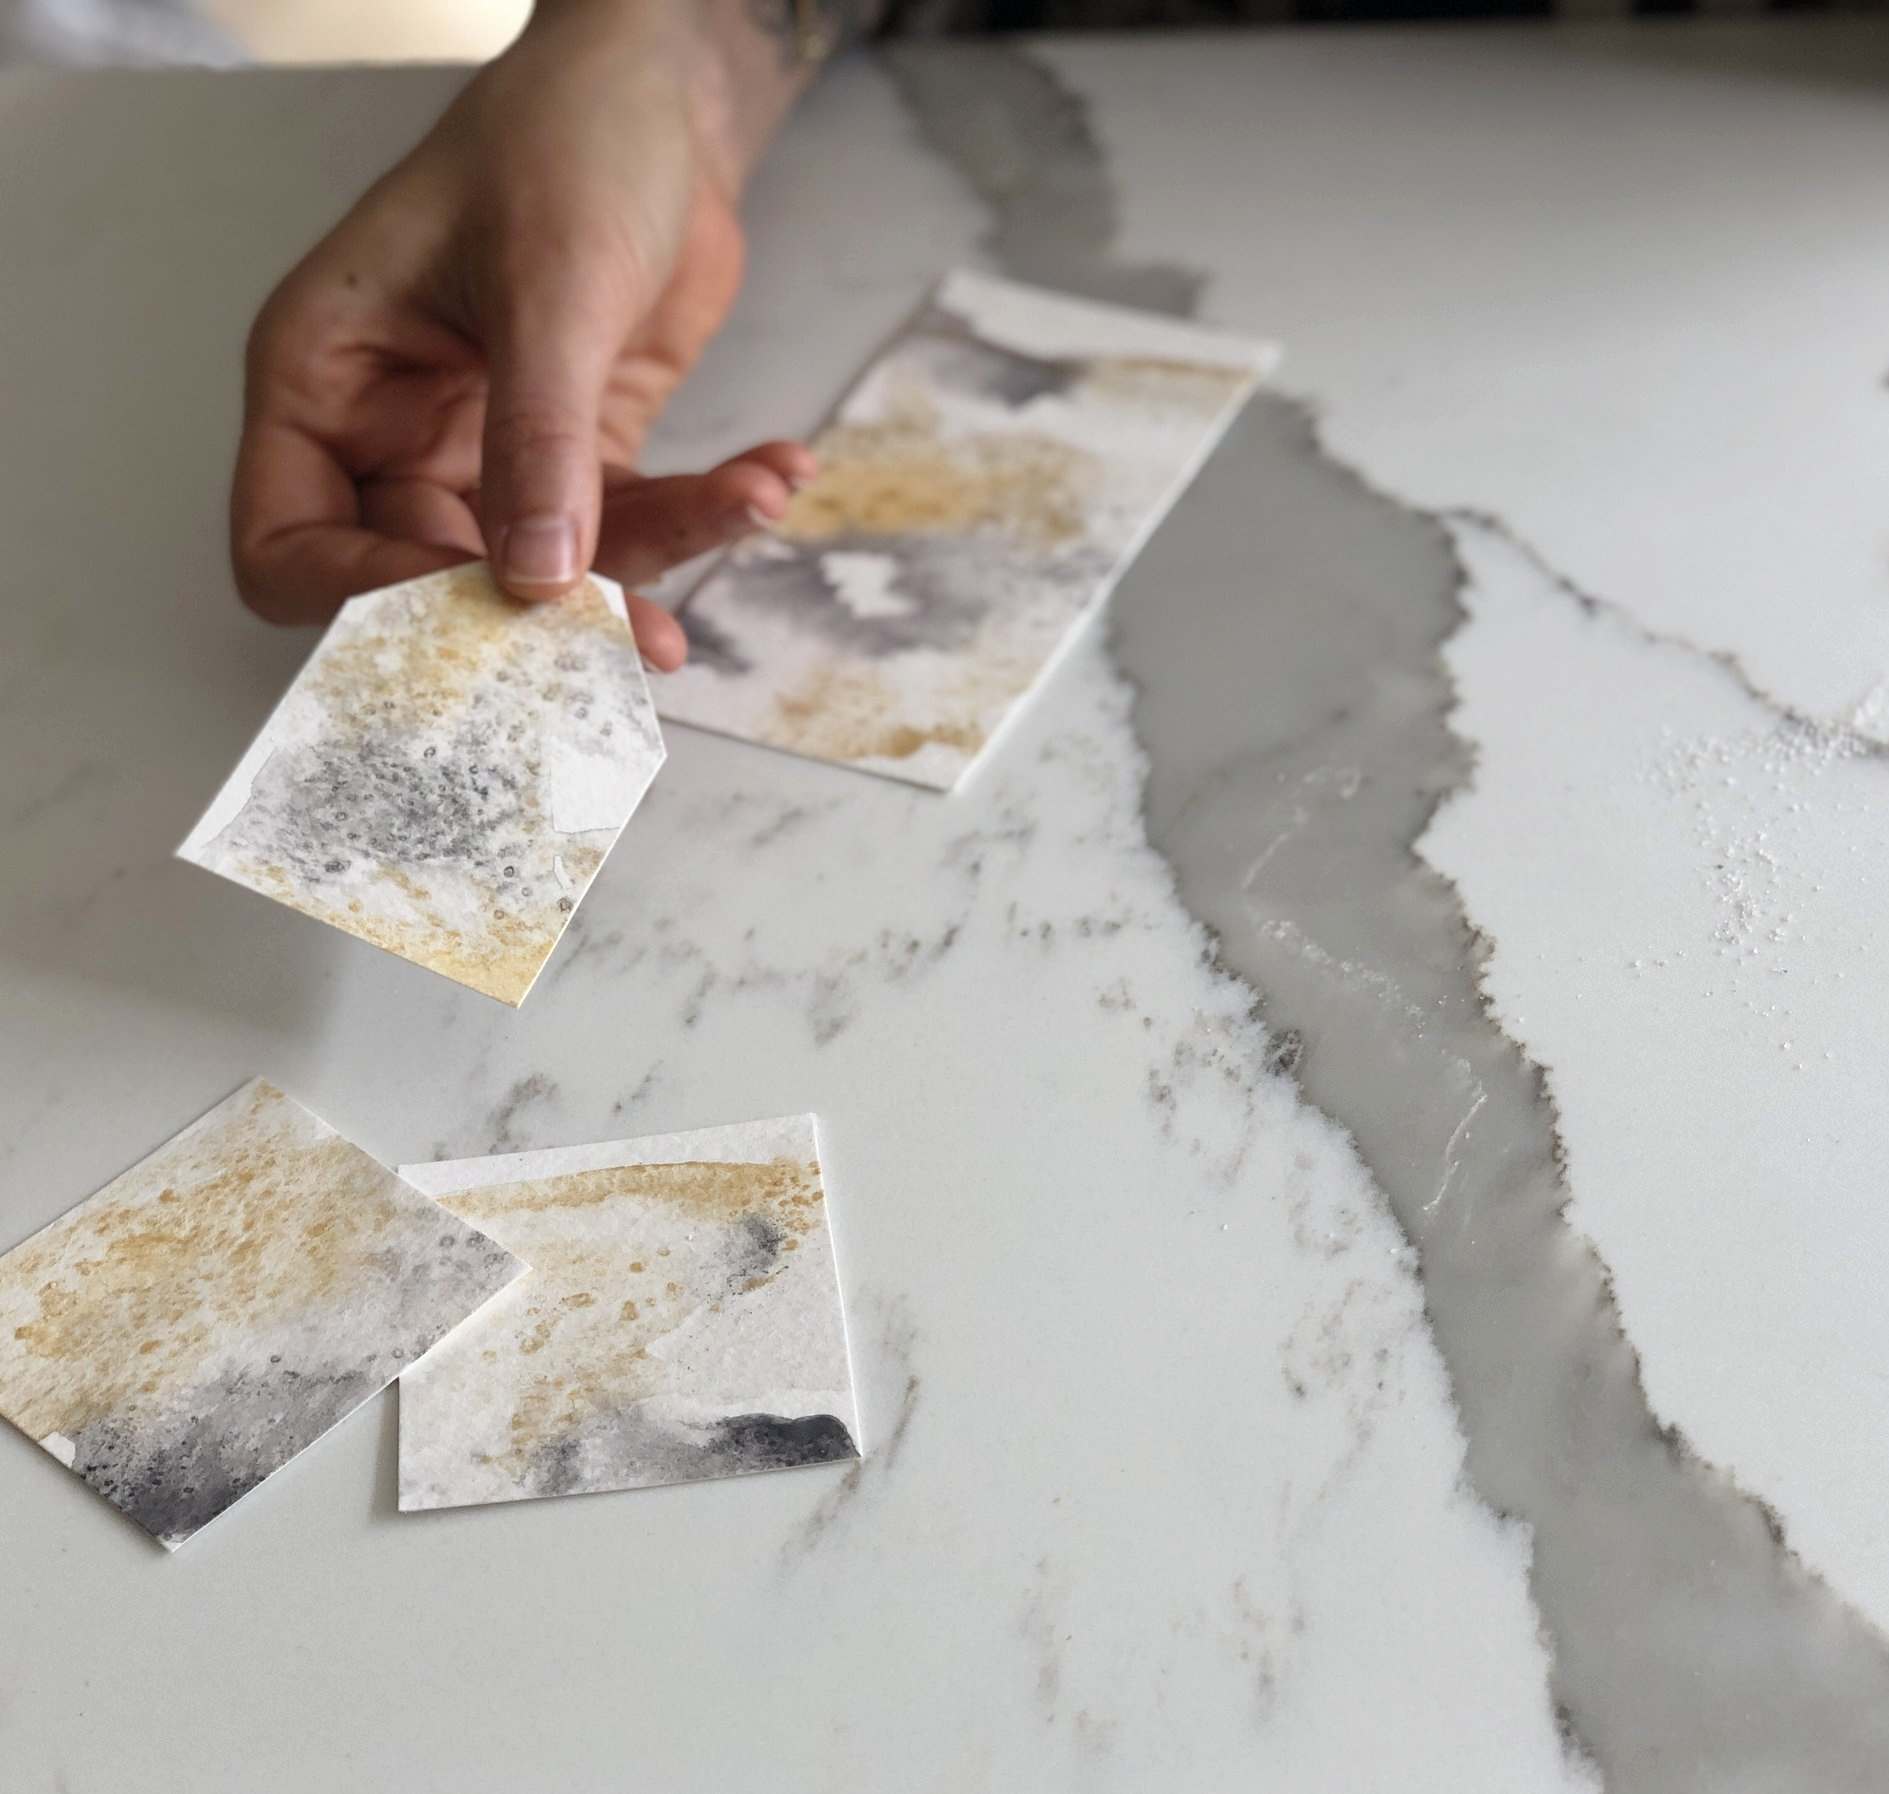
Step 4: Once paint is totally dry, use your fingers to gently rub off the salt crystals. Admire the magical effects of the interaction of paint, water, and salt!
Step 5: Cut your painting into gift tags…whatever shape and size you like!
Step 6: Punch a hole in each tag, write a note to your recipient (I usually write on the white unpainted side), and attach to your gift with twine or ribbon.